Easy Installation
Start installation now!
Read on for a step-by-step guide!
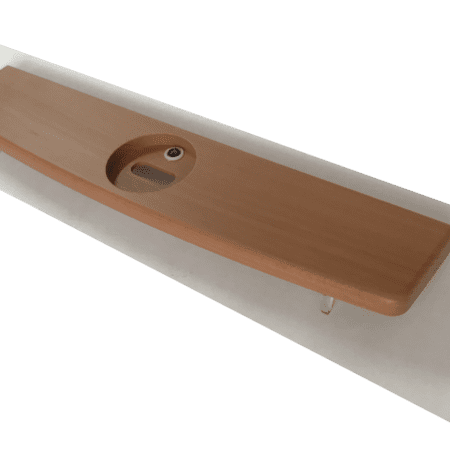
Wall-mounting
3D humidifier are attached to the wall. A screw with dowel are included. Drill 160 cm above the floor.
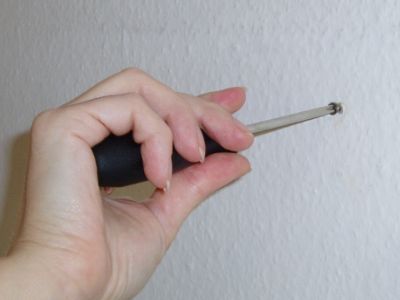
Attach the unit and firmly tighten the screw
Check the head of the screw resting on the metal-plate.
Fold the first groov sharply (the second groov is already folded)
It takes the shape of an upside-down “U”.
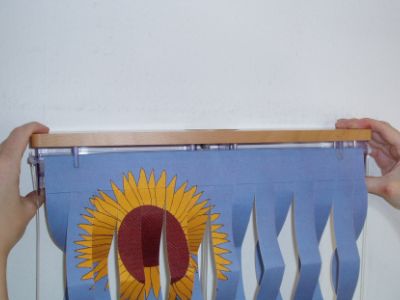
Attach the Panel

Insert the upper part that you have just folded onto the front wall of the capillary basin, between the wall and the 4 columns. There is a pin in the middle of that wall. Use it to center the unit.
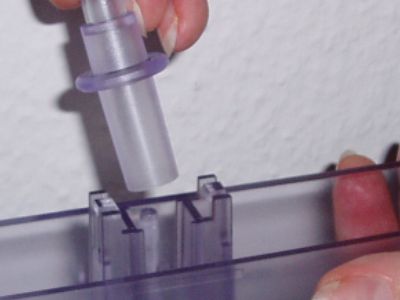
Insert the Hose

Push the hose through the center of the capillary basin from above.
Fix the wooden-platte
Now click on the wooden plate and press it into the clamps on each side.
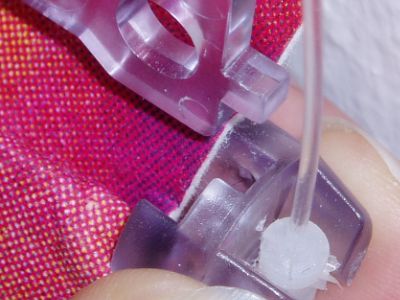
Fix the end of the hose
Click the end of the hose into a clamp in the middle of the catch basin and fix it there.
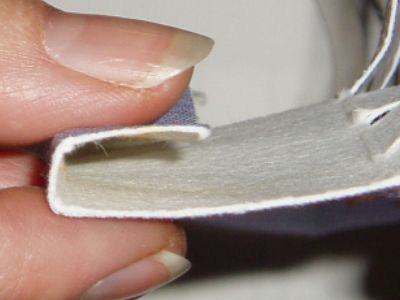
Put the chalk-absorber into the catch-basin

Unfold the descaler and place its center (indicated by a hole) into the center of the catch basin between the column and the back wall.
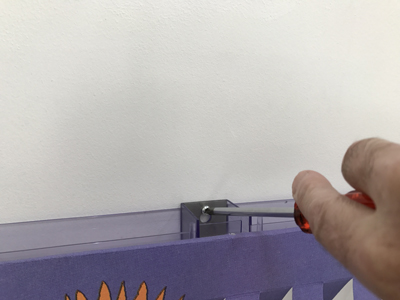
Fix the panel to the 3 carriers, left-side
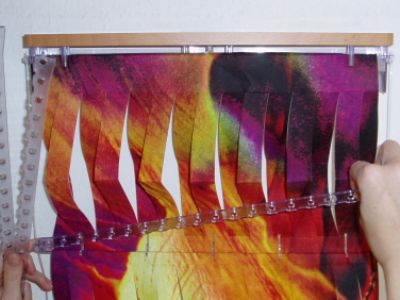
Put the clamp bar with the jagged end down into the left hole of the carrier-stick. Hold the panel and clamp-bar with the thumb of your left hand.
Fix the panel to the 3 carriers, right-side
Lift the panel on the right-hand side onto the carrier and push the clamp bar down into the groove. Now lock the clamp-bar by applying slight pressure toward your body.
Positioning the end of the panel inside the catch basin
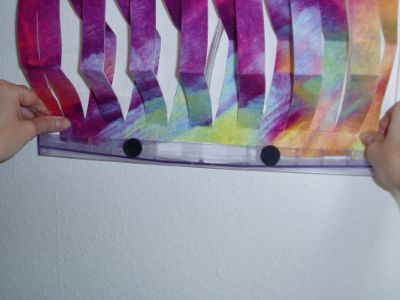
Remove the crescent-shaped hole from the end of the panel. Now put the last flat part of the panel straight down into the catch-basin, between the front-wall and the 4 columns.
Fill the water tank
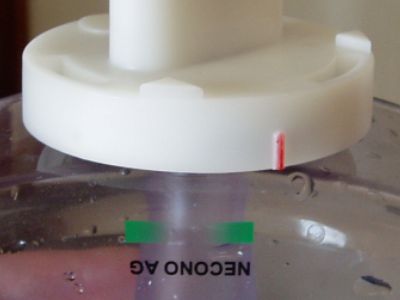
Fill the water tank up to the top. Now put the stopper on top and twist it to fix in place (marking is parallel with the LOGO).
Place the entire water tank on top of the unit
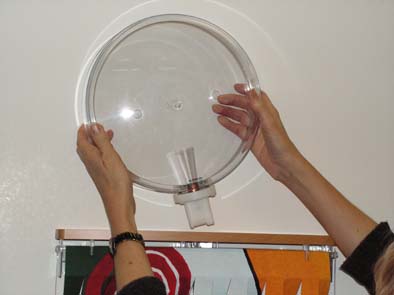
Turn the whole water-tank clockwise (watch the logo). Then insert the stopper from above, through the wooden plate and into the capillary basin. Check that the water is level on each side of the capillary basin. Adjust if necessary. That’s it.
You did it!

Checklist
- the panel stnds inside the catch-basin.
- the hose is fix connected to the wooden-platt and the catch-basin
- the stopper did Close without gape.
- the capillary-basin does touch the wall without gape.
- the water inside the capillary-basin is on the same Level (to the left and to the right).
- the Panel can on the upper side slighly be moved on the front-wall of the capillary-basin.
Dokumente:
Watch this video for a step-by-step installation guide. English version under construction!
Checklist:
- the panel is upright in the catch basin.
- the hose is connected firmly to the wooden plate and the catch basin
- the stopper closed without a gap.
- the capillary basin touches the wall without a gap.
- the water inside the capillary-basin is on the same level (on the left and the right).
- the upper side of the panel can be moved slightly on the front wall of the capillary basin.
the Panel can on the upper side slightly be moved on the front-wall of the capillary-basin.
easy Cleaning
Cleaning is simple 🙂 :a written instruction you will find under “Downloads” aswell
Your 3D humidifier is very, very easy and quick to clean. Watch the movie below.
cleaning the water tank that is shown in the film will be much easier than the representation in the cleaning instructions. Thake lightly warms or cold water with detergent.
3D humidifiers pollute much less, which is why: The air circulation, which runs from top to bottom, so, with reversed circulation, requires less water to achieve the same efficiency. Since less water is needed, less lime comes into the device, so the pollution is smaller.
Capillary and collecting basins may be cleaned with undiluted rapid detergent.